How to Tie Horse: Complete Guide for Safety and Success
Tying a horse safely is one of the most fundamental skills every horse owner and rider must master. Whether you're grooming, saddling, or simply need to secure your horse temporarily, knowing how to tie a horse securely can prevent accidents, injuries, and runaway situations that could endanger both you and your beloved equine companion.
The key to successful horse tying safety lies in understanding proper techniques, choosing the right equipment, and selecting safe locations. A well-tied horse should be secure enough to prevent escape but always have a safety release knot that allows for quick freedom if panic strikes. This comprehensive guide will walk you through everything from basic tying knots for horses to advanced safe tying practices that professional trainers swear by. 🐴
At Dream Horse, we understand that proper horse handling starts with the right equipment - from quality halter and lead rope combinations to specialized tie rings that ensure your horse's safety and your peace of mind.
Chapter 1: Essential Equipment and Safety Fundamentals
The Foundation of Safe Horse Tying
Before diving into specific techniques, understanding your equipment is crucial for preventing horse injury during tying. Your horse lead rope serves as the primary connection between your horse and the tie point, making its quality and condition paramount to safety.
A proper halter and lead rope setup should feature a rope at least 10-12 feet long, allowing sufficient movement while maintaining control. The material matters too - cotton ropes provide excellent grip but can cause rope burns, while synthetic materials offer durability and weather resistance. At Dream Horse, our curated collection of equestrian accessories includes premium lead ropes designed specifically for safe tying practices.
Safe tying practices begin with inspecting your equipment before each use. Check for frayed areas, worn hardware, and proper functioning of snaps and buckles. A rope that breaks under pressure can turn a routine tying session into a dangerous situation where your horse bolts with trailing equipment.
Understanding Horse Psychology During Tying
Horse behavior while tied varies significantly between individual animals and their training levels. Some horses stand quietly for hours, while others become anxious within minutes. This behavioral difference stems from their flight instinct - horses are prey animals programmed to flee from perceived threats.
Why horses pull back often relates to past experiences, insufficient training, or feeling trapped. When a horse pulls back against a solid tie, the pressure increases, triggering their panic response. This is precisely why every knot you use should be a quick-release knot that can be undone instantly, even under tension.
Teaching a horse to tie properly requires patience, consistency, and the right approach. Start with short sessions using a horse patience pole - a specialized training tool that helps horses learn to yield to pressure rather than fight against it. This foundational training prevents most tying-related accidents before they occur.
Chapter 2: The Quick-Release Knot - Your Safety Lifeline
Mastering the Essential Safety Knot
The quick-release knot stands as the gold standard for tying up a horse properly. Unlike traditional knots that tighten under pressure, this knot maintains its ability to release instantly, even when your horse pulls back with considerable force.
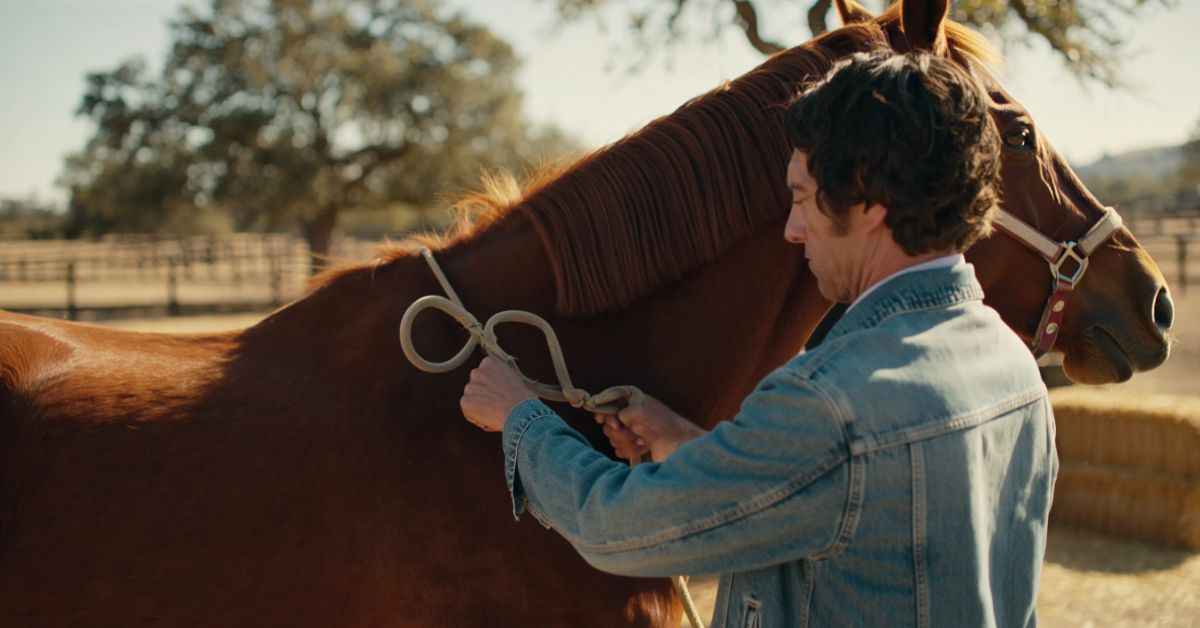
How to tie a quick-release knot involves creating a slip loop that can be pulled free with a single sharp tug on the loose end. Here's the step-by-step process:
-
Step 1: Pass your lead rope around the tie point, leaving about 3 feet of working end
-
Step 2: Create a loop with the working end, passing it over the standing line
-
Step 3: Pull a bight (folded section) of rope through this loop, but don't pull the entire end through
-
Step 4: Tighten by pulling on the standing line while holding the bight
-
Step 5: Test the release by pulling sharply on the loose end
The beauty of this safety release knot lies in its dual nature - secure enough for normal use, yet instantly releasable in emergencies. Professional trainers often say, "If you can't untie it in a panic, don't tie it at all."
The Australian Quick-Release Knot Variation
The Australian quick-release knot offers an enhanced version of the standard quick-release, featuring an additional safety loop that prevents accidental release while maintaining emergency functionality. This knot gained popularity among Australian stockmen who needed absolute reliability in harsh outback conditions.
This variation includes an extra half-hitch that locks the release mechanism, preventing curious horses from untying themselves while preserving the panic-release capability. The additional security makes it ideal for longer tying sessions or when dealing with horses known for testing their restraints.
Many riders prefer this knot for tying to a trailer during long hauling stops, where security matters but safety remains paramount. The slight additional complexity pays dividends in peace of mind during extended travel days.
Chapter 3: Strategic Locations and Tying Height Considerations
Choosing a Safe Tie Location
Tying to a post requires careful evaluation of both the post's strength and the surrounding environment. A proper tie point should withstand at least 1,000 pounds of pulling force - the amount an average horse can exert when panicking. Wooden posts should be at least 6 inches in diameter and set at least 3 feet deep for adequate strength.
Hitching post installations vary widely in quality and design. Traditional wooden hitching posts work excellently when properly installed, but modern tie ring for horses systems offer superior safety features. These specialized rings often include breakaway mechanisms set to release at predetermined force levels, typically between 500-800 pounds.
The environment around your tying location matters just as much as the tie point itself. Avoid areas with:
-
Sharp corners or protruding objects
-
Loose wire or fencing materials
-
Other horses within kicking distance
-
High-traffic areas where distractions occur
-
Uneven footing that could cause slipping
Correct Tying Height and Distance Management
Correct tying height typically ranges from the horse's chest to their withers height - approximately 4 to 5 feet for average-sized horses. This height prevents the horse from stepping over the rope while discouraging attempts to graze or wander.
Distance from the tie point should allow about 2-3 feet of movement in any direction. Too close creates a feeling of confinement that triggers claustrophobia, while too much rope allows tangling and potential injury from stepping on the lead.
Lead rope management becomes critical when multiple horses are tied in proximity. Each horse should have enough space to move comfortably without interfering with neighboring animals. Professional recommendation suggests at least 8 feet between tie points when securing multiple horses simultaneously.
Chapter 4: Advanced Techniques and Special Situations
Cross-tying a horse provides the ultimate in security and control for activities like grooming, veterinary work, or detailed tack fitting. This technique uses two lead ropes attached to opposite sides of the horse's halter, with each rope secured to anchor points on either side of the working area.
The cross-tie system prevents forward, backward, and sideways movement while still allowing the horse to shift weight naturally. Tying a horse for grooming using this method ensures both horse and handler safety during detailed work sessions. Quality cross-tie hardware includes panic snaps on both ends, ensuring instant release capability from either side.
Horse ground tying represents the pinnacle of training achievement - teaching your horse to stand still with the lead rope simply draped on the ground. While not technically "tying," this skill proves invaluable for situations where no tie points exist or when working alone requires temporary horse control.
Tying to a Trailer - Special Considerations
Tying to a trailer presents unique challenges requiring modified techniques. Trailers move slightly with wind and horse movement, making rigid tying dangerous. Always tie to designated tie points - never to doors, fenders, or trailer lights that could break under pressure.
Trailer manufacturers typically install specific tie rings designed for horse restraint. These rings often incorporate breakaway features calibrated for trailer use. The ring should be mounted solidly to the trailer frame, not just the exterior panels which may not withstand pulling forces.
Consider using a tie ring for horses with a built-in shock absorber when trailer tying. These devices allow slight give during normal movement while maintaining security. The shock absorption reduces stress on both horse and trailer while preventing the jarring sensation that often triggers pulling behavior.
Tying with Twine - The Professional's Backup System
Tying with twine involves incorporating a weak link into your tying system - typically a loop of baling twine that breaks under extreme pressure. This technique originated in working ranches where cowboys needed absolute reliability with built-in safety margins.
Tying a horse with a bailing twine loop works by creating the twine loop at the tie point, then securing your lead rope to this loop using your chosen knot. If the horse panics and pulls back violently, the twine breaks before injury occurs, releasing the horse while keeping your expensive lead rope intact.
Professional trainers often recommend twine breaking strength around 200-300 pounds - enough to handle normal movement but weak enough to break before causing injury. This technique proves especially valuable when tying with a safety snap isn't possible or when working with known pullers.
Chapter 5: Horse Training Tips and Problem-Solving Solutions
Desensitizing a Horse to Tying
Desensitizing a horse to tying requires systematic approach and endless patience. Begin with horse handling techniques that build trust and confidence before attempting any restraint. A horse that doesn't trust their handler will never tie safely, regardless of knot quality or equipment used.
Start training sessions with simple pressure-and-release exercises using the lead rope. Apply gentle pressure and immediately release when the horse yields, even slightly. This fundamental concept teaches horses that yielding to pressure brings relief, while fighting increases discomfort.
Horse training tips from professional trainers emphasize consistency above all else. Every interaction should reinforce the same principles - pressure means yield, yielding brings comfort, and standing quietly brings rewards. Mixed messages during training create confused, potentially dangerous horses.
As renowned horse trainer Pat Parelli once said, "It's not about making the horse do what you want, it's about making the horse want to do what you want." This philosophy applies perfectly to tying training - create positive associations with restraint rather than forcing compliance.
Troubleshooting Common Tying Problems
Emergency release knot techniques become essential when dealing with horses that have developed pulling habits. These horses require specialized approaches combining proper equipment, strategic positioning, and modified training techniques.
The horse patience pole offers an excellent solution for chronic pullers. This device uses an inner tube or similar elastic component that absorbs the shock of pulling while maintaining consistent pressure. The horse learns that pulling doesn't provide the explosive release they expect, gradually reducing the pulling behavior.
Hitching a horse successfully often depends on reading their body language and adjusting accordingly. Signs of impending panic include:
-
Elevated head carriage and wide eyes
-
Rapid breathing and nostril flaring
-
Pawing or shifting weight repeatedly
-
Backing up against the tie pressure
-
Calling to other horses anxiously
Recognizing these warning signs allows intervention before panic sets in. Sometimes simply repositioning the horse or adjusting the tie height resolves brewing problems before they escalate.
Frequently Asked Questions on How to Tie Horse
What is the safest knot for tying horses?
The quick-release knot remains the safest option for tying a horse because it releases instantly under pressure while maintaining security during normal use. This safety release knot can be untied even when the horse pulls back, preventing dangerous situations where the horse feels trapped.
How high should I tie my horse?
Correct tying height should be at your horse's chest level, typically 4-5 feet from the ground. This height prevents the horse from stepping over the rope while discouraging grazing and wandering behaviors.
Can I tie directly to my trailer?
Tying to a trailer should only be done at manufacturer-designated tie points. Never tie to doors, fenders, or lighting fixtures. Always use a quick-release knot and consider using breakaway twine for additional safety.
Why does my horse pull back when tied?
Why horses pull back usually stems from fear, inadequate training, or past negative experiences. Address this through systematic desensitizing a horse to tying training and always use safe tying practices with proper emergency release knot techniques.
What equipment do I need for safe horse tying?
Essential equipment includes a quality halter and lead rope, appropriate tie points like a hitching post or tie ring for horses, and knowledge of tying knots for horses. Consider breakaway twine and quick-release hardware for additional safety measures.
At Dream Horse, we're passionate about equestrian safety and style. Our carefully curated collection of horse enthusiast gifts includes premium halters, lead ropes, and safety equipment designed to keep you and your horse safe during every interaction. Express your style while prioritizing safety - because your horse deserves nothing less than the best. 🐴✨
